Tired of a messy kitchen? These 7 practical, no-nonsense hacks will transform your space without expensive gadgets or hours of work.
- June 17, 2026
AceShowbiz - I once spent twenty minutes searching for a garlic press that I swore I owned, only to find it buried behind a stack of mismatched Tupperware lids in a drawer I hadn't opened since 2019. If that sounds familiar, you're not alone. The average American kitchen contains over 200 items, but most of us use maybe twenty of them regularly. The rest just take up space, collect dust, and make cooking feel like an archaeological dig.
Here's the hard truth: most kitchen organization advice is either too expensive (custom drawer inserts that cost more than your blender) or too impractical (color-coding your spices by rainbow when you just want to find cumin). This article is for the rest of us—people who want a functional kitchen without turning it into a museum exhibit. Let's get real about what actually works.
Why Your Drawers Are a Disaster and How to Fix Them
The junk drawer is a universal experience, but the real problem is every drawer. When you open a drawer and see a jumble of spatulas, measuring spoons, takeout menus, and three different kinds of can openers, your brain registers that as chaos. And chaos in the kitchen means you're less likely to cook, more likely to order delivery, and definitely more likely to buy duplicates of things you already own.
Start with the drawer nearest your stove—the one you access most. Empty it completely. Group items by function: cooking utensils, gadgets, tools. Here's where most people mess up: they try to keep everything. You don't need four spatulas. You need one good silicone spatula for flipping eggs, one metal one for flipping burgers, and maybe one slotted spatula. That's it. Anything beyond that is just taking up real estate.
For the remaining items, use adjustable drawer dividers. Not the expensive custom bamboo ones—the cheap expandable plastic ones from any home store. They cost under ten dollars and can be cut to fit. Arrange your utensils in groups: tongs together, spoons together, peelers and graters together. When you put the drawer back together, you'll actually be able to see everything at a glance. That's the goal: visibility, not perfection.
Actionable tip: Before you buy any drawer organizer, measure the inside dimensions of your drawer. Most standard drawers are 18-22 inches wide, but yours might be different. Write the measurements on a sticky note and stick it inside the drawer so you don't have to measure again.
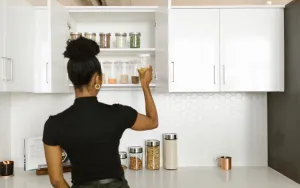
The Cabinet Shelf Hack That Doubles Your Storage Instantly
Cabinet shelves are designed for canned goods and cereal boxes, not for the chaotic reality of our lives. You've got tall bottles of olive oil, short jars of spices, stacks of mixing bowls, and that one pan you never use but feel guilty throwing away. The result is wasted vertical space—air between the top of your short items and the shelf above. That air could be holding more stuff.
Enter the wire shelf riser. These are essentially small metal or plastic platforms that sit on your existing shelf and create a second level. You can find them at any home goods store for about five dollars each. Place one on a shelf to create two tiers: short items in front (like spice jars or small cans), taller items behind (like vinegar bottles or pasta boxes). Suddenly, a single shelf can hold twice as much without feeling crowded.
For upper cabinets—the ones you can barely reach without a step stool—use a lazy Susan. Yes, the same rotating tray your grandmother used for condiments works perfectly for storing oils, vinegars, and sauces. The rotating mechanism means you don't have to dig around in the back of the cabinet. A single spin brings everything to the front. This is especially useful for corner cabinets, which are notoriously difficult to access.
Actionable tip: Don't buy a lazy Susan until you measure the depth of your cabinet. Standard sizes are 10, 12, and 14 inches in diameter. A 12-inch lazy Susan works for most standard cabinets, but measure first to avoid a return trip to the store.
How to Organize Your Fridge So Food Actually Gets Eaten
The average American household wastes about $1,500 worth of food every year. A lot of that waste happens because we can't see what's in our fridge. That container of leftover chili from Tuesday? It's hiding behind the milk, and by the time you find it on Saturday, it's a science experiment. The solution isn't a $200 fridge organizer system—it's a simple rule: first in, first out.
Designate one shelf as the "eat me first" zone. This is where you put leftovers, soon-to-expire items, and anything that needs to be consumed within the next two days. Make this shelf eye-level—usually the middle shelf. When you open the fridge, you should see your perishables immediately. The milk, eggs, and condiments can go on the door or lower shelves, but that middle shelf is prime real estate for things that need attention.
Use clear, stackable bins for produce. Not the fancy glass ones—the cheap plastic ones from a dollar store. Sort your produce by type: one bin for leafy greens, one for root vegetables, one for fruits that need to be eaten soon. The transparency is key: when you can see everything, you're more likely to use it. And stackable means you can use vertical space in your crisper drawers, which are notoriously deep and wasteful.
Actionable tip: Every Sunday, do a five-minute fridge scan. Pull out anything that's close to expiration and put it on the "eat me first" shelf. If you can't use it, freeze it or compost it. This habit alone can cut your food waste by at least 30 percent.
The Spice Drawer System That Ends the Hunt for Cumin
Spice organization is the most common kitchen complaint I hear. People buy spice racks, magnetic strips, tiered shelves, and even wall-mounted organizers, only to end up with a drawer full of mismatched jars and no idea which one is paprika. The problem isn't the container—it's the system. You need a way to see all your spices at once, alphabetically, without digging.
Switch to uniform jars. Buy a set of small glass jars with airtight lids—the kind that cost about twenty dollars for a set of twelve. Transfer your spices into these jars and label them clearly with a permanent marker or a label maker. The uniformity means they stack neatly, and the clear glass lets you see the color of the spice (which helps when you're looking for turmeric versus curry powder).
Store them in a shallow drawer with a simple grid organizer. The grid keeps each jar in its place, so you don't have to shuffle through a pile. Arrange them alphabetically: allspice, basil, cayenne, cumin, dill, garlic powder, and so on. Yes, alphabetical takes a few minutes to set up, but once it's done, you'll never waste time hunting again. If you don't have a shallow drawer, use a tiered shelf on your counter or in a cabinet.
Actionable tip: Buy spices in small quantities—those big Costco jars might seem like a deal, but spices lose potency after about six months. You're better off buying small jars from a bulk bin or a discount store and replacing them every few months. Your taste buds will thank you.
Pantry Organization Without the Pinterest Pressure
Pantry organization on social media looks like a sterile laboratory: matching glass jars, wooden crates, and labels that look like they were printed by a professional calligrapher. That's not real life. Real life is a bag of rice that's been open for three months, a half-eaten box of crackers, and a can of beans you bought because it was on sale. The goal isn't Instagram-worthy—it's functional.
Start by grouping like items together. All canned goods in one area, all grains in another, all snacks in a third. Use simple baskets or bins to keep these groups separated. You don't need matching baskets—any container will do, as long as it's sturdy and easy to clean. Label each bin with a piece of masking tape and a marker: "Canned Vegetables," "Pasta and Rice," "Snacks." That's it. No calligraphy required.
Use the front-to-back rule: put newer items in the back, older items in the front. This ensures you use up what you have before buying more. And here's a practical tip that most people ignore: keep a small whiteboard or a sticky note on the inside of your pantry door. Every time you run out of something, write it down immediately. When you go shopping, you'll have a real list instead of guessing.
Actionable tip: Once a month, do a "pantry audit." Pull everything out, check expiration dates, and donate unopened items you know you won't use. This takes about fifteen minutes and prevents your pantry from turning into a museum of forgotten groceries.
Countertop Clutter: The One-Item Rule That Changes Everything
Your countertop is prime real estate, but most people treat it like a storage shelf. Coffee maker, toaster, knife block, fruit bowl, salt and pepper grinders, a plant, a jar of wooden spoons, a stand mixer you use twice a year—suddenly you have no space to actually prepare food. The solution is brutally simple: limit countertop items to one per category.
Choose one appliance that you use daily (for most people, that's a coffee maker or a kettle) and keep it on the counter. Everything else—toaster, blender, food processor, slow cooker—goes in a cabinet or a pantry. Pull them out when you need them, put them away when you're done. Yes, it takes an extra thirty seconds. But it saves you from looking at a cluttered counter every single day.
For items like knives, use a magnetic strip mounted on the wall or inside a cabinet door instead of a bulky knife block. For utensils, use a small crock or a drawer insert. For oils and salt, keep them near the stove but in a small tray that can be moved aside when you need the full counter. The goal is to have at least 70 percent of your countertop clear at all times. That clear space is where you'll actually cook, and cooking becomes more enjoyable when you're not fighting for elbow room.
Actionable tip: Try the "one-week challenge." For seven days, keep only three items on your counter: a coffee maker, a fruit bowl, and a salt shaker. Everything else goes into a cabinet. After a week, notice how much easier it is to cook and clean. You'll never go back.
The Maintenance Mindset: How to Keep Your Kitchen Organized Long-Term
Organizing your kitchen once is easy. Keeping it organized is the real challenge. Within a month, most people revert to their old habits: shoving things into drawers, leaving clutter on the counter, and buying duplicates of items they already own. The secret to long-term organization isn't willpower—it's systems that require minimal effort.
Implement the "one in, one out" rule: every time you buy a new kitchen item (a spatula, a jar, a gadget), remove one old one. This prevents accumulation. It also forces you to be intentional about purchases. Do you really need that avocado slicer when you already own a knife? Probably not. The rule keeps your kitchen from becoming a collection of impulse buys.
Spend five minutes at the end of each day doing a "kitchen reset." Wipe down the counters, put away any items that migrated to the table or living room, and make sure the sink is empty. That's it. Five minutes. This small habit prevents the slow creep of clutter that turns a clean kitchen into a disaster zone. Think of it as brushing your teeth for your kitchen—a small daily effort that prevents bigger problems later.
Actionable tip: Set a recurring timer on your phone for 8 PM every night. When it goes off, do your five-minute kitchen reset. After two weeks, it will become automatic, and you'll wonder how you ever lived without it.
Your kitchen doesn't need to look like a magazine spread. It needs to work for you. These hacks aren't about perfection—they're about reducing friction. When your drawers are organized, your spices are visible, and your counter is clear, cooking becomes easier, faster, and more enjoyable. And that's the whole point. Start with one drawer or one shelf today. The rest can wait. Your future self—the one who can find the garlic press in under ten seconds—will thank you.