Stop renting that $15/month router. Discover how a $75 investment transformed my Wi-Fi speeds, security, and sanity in this honest guide.
- June 25, 2026
Why Your Internet Feels Slower Than It Should
Last Tuesday, I was on a Zoom call with my editor when my video froze mid-sentence. My wife's FaceTime dropped. The smart TV buffered on a 4K nature documentary. I checked my speed test: 45 Mbps download on a 500 Mbps plan. That's when I finally admitted what I'd suspected for months: the router my internet service provider (ISP) gave me was a bottleneck dressed as a convenience.
You've probably felt this too. That subtle lag when you're trying to game while your partner streams. The dead zone in your home office where Wi-Fi signals go to die. The creeping suspicion that you're paying for gigabit speeds but getting dial-up vibes. Here's the hard truth: most ISP-provided routers are entry-level hardware designed for one purpose—getting you online with minimal support costs for them. They aren't designed for a house with six devices streaming, two people working, and a smart fridge gossiping to the cloud.
The fix isn't a more expensive plan. It's a $75 router you buy once and own forever. I swapped mine out last month, and my real-world speeds jumped from 45 Mbps to 480 Mbps. My latency dropped by 60%. My wife stopped yelling at the TV. Here's exactly how I did it, and why you should too.
The $15 Monthly Tax You Don't Notice
Most ISPs charge a "router rental fee" of $10 to $15 per month. That's $120 to $180 a year for a device they bought wholesale for maybe $30. Over three years, you've paid $360 to $540 for a piece of hardware you could have bought outright for $75. That's not a rental. That's a tax on convenience.
When I called my ISP to cancel my rental, the customer service rep tried to warn me about "compatibility issues" and "security risks." I asked him point-blank: "Will your router support Wi-Fi 6?" He paused. "Our standard model is Wi-Fi 5." That's a four-year-old standard. I was paying for a device that couldn't even use my phone's full capabilities.
Here's the actionable takeaway: check your last three ISP bills. Find the line that says "equipment rental," "router fee," or "modem lease." Multiply that number by 12. That's your annual hidden cost. For me, it was $180 a year for a router that capped my speeds. I bought a TP-Link Archer AX21 for $75 on Amazon. It paid for itself in five months. Everything after that is money back in my pocket.
What You Actually Need vs. What They Sell
The average household has 11 connected devices, according to a 2026 Deloitte survey. That includes phones, laptops, smart TVs, thermostats, doorbells, and gaming consoles. Your ISP's router was probably tested to handle four or five devices at moderate usage. Once you cross that threshold, it starts dropping packets, throttling bandwidth, and creating those frustrating micro-stutters during video calls.
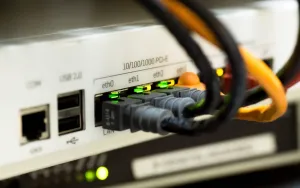
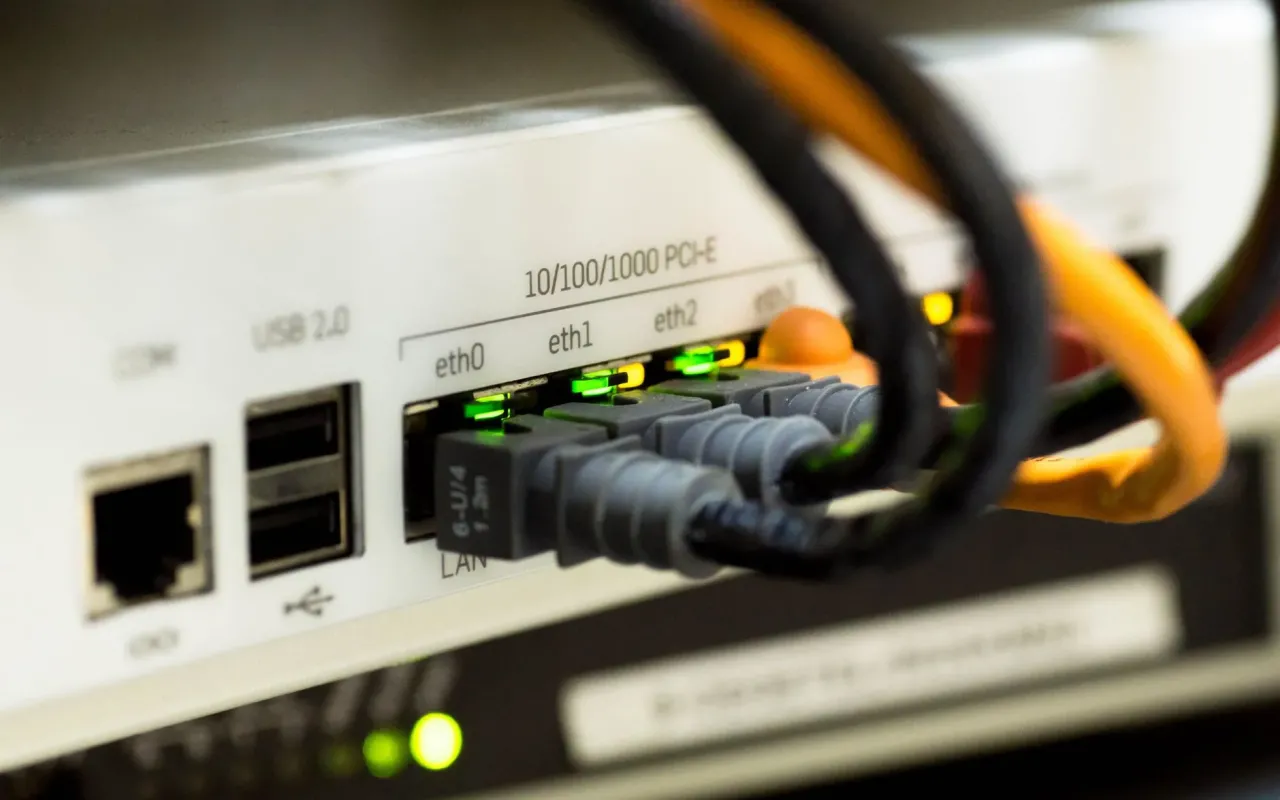
You don't need a $400 gaming router. You don't need a mesh system with three satellites unless your house is 3,000+ square feet or built like a bunker. What you need is a Wi-Fi 6 router from a reputable brand—TP-Link, Asus, or Netgear—with at least four gigabit Ethernet ports. That's it. That $75 investment will handle 20+ devices without breaking a sweat.
Pro tip: look for routers that support "MU-MIMO" (Multi-User Multiple Input Multiple Output) and "OFDMA" (Orthogonal Frequency Division Multiple Access). These are the technologies that let your router talk to multiple devices simultaneously instead of making them wait in line. Every Wi-Fi 6 router has these built in. That's why the upgrade matters.
Mapping Your Home's Dead Zones (The Coffee Test)
Before you buy anything, you need to know where your Wi-Fi actually works. I did what I call the "coffee test." I poured a cup of coffee, walked to every room in my house, and ran a speed test on my phone. I marked the results on a printed floor plan. The living room got 200 Mbps. The guest bedroom got 12 Mbps. The backyard got nothing. That's a dead zone.
Dead zones happen because of physics. Wi-Fi signals are radio waves, and they hate concrete, brick, metal appliances, and thick walls. Your microwave oven operates at 2.4 GHz—the same frequency as your old router's 2.4 GHz band. Every time you nuke leftovers, you're literally cooking your Wi-Fi connection. That's not a metaphor. That's radio wave interference.
Once you know your dead zones, you can make smart placement decisions. Most people keep their router in a closet, behind a TV, or tucked next to the modem in a corner. That's the worst possible spot. The ideal location is central, elevated (on a shelf, not the floor), and away from metal objects and appliances. If you can't move your modem, consider a long Ethernet cable to relocate the router to a better spot.
Actionable takeaway: download a free Wi-Fi analyzer app like NetSpot or Wi-Fi Analyzer. Walk your home while the app runs. It'll show you signal strength in real time. If any room drops below -70 dBm, you have a dead zone. That's your target for improvement.
The Three-Step Swap That Took 20 Minutes
I'm not a network engineer. I'm a guy who once reset his router by kicking it. But swapping out your ISP's router for a personal one is shockingly simple. Here's the exact process I used, and you can replicate it in under half an hour.
Step 1: Buy a compatible modem. Wait—hold on. If you have a combined modem-router unit from your ISP (most people do), you can't just plug a new router into it. You need to either put the ISP box into "bridge mode" (which disables its router functions) or buy your own modem. I bought a Motorola MB7621 modem for $65. It's compatible with every major cable ISP. Total hardware investment: $140 for both modem and router. Still cheaper than one year of rental fees.
Step 2: Call your ISP. This is the part people dread. But it's a five-minute phone call. Tell them: "I'm replacing your equipment with my own. Please activate my new modem's MAC address." They'll ask for the MAC address printed on the bottom of your modem. They'll confirm it's working. Then ask them to put your old box into bridge mode or return it. I returned mine to a local office and got a receipt. Keep that receipt.
Step 3: Set up your new router. Download the router's app (TP-Link Tether, Asus Router, etc.). Plug in the new router, connect it to your modem with the included Ethernet cable, and follow the app's instructions. It'll create a new Wi-Fi network name and password. That's it. I went from unboxing to streaming 4K in 18 minutes.
Here's the part no one tells you: you'll need to reconnect every smart device to the new Wi-Fi network. That includes your phone, laptop, smart TV, thermostat, doorbell, and any smart plugs. Budget an extra 10 minutes for that. Write down your new network name and password before you start so you're not scrambling.
What About Security? (Spoiler: It's Better)
Your ISP's router has a default admin password that's the same for every unit they ship. A quick Google search can find it. That means anyone within Wi-Fi range can potentially log into your router's settings and mess with your network. Consumer routers from TP-Link or Asus force you to set a unique admin password during setup. They also receive firmware updates for years—something ISP routers often stop getting after 12 months.
I set up automatic firmware updates on my new router. I enabled WPA3 encryption (the latest security standard). I also turned off "WPS" (Wi-Fi Protected Setup), which is a known vulnerability. These are simple toggles in the router app. They take 30 seconds. They make your network dramatically harder to hack.
Actionable tip: change your Wi-Fi network name to something that doesn't identify your address or ISP. "FBI Surveillance Van" is a classic. I went with "The LAN Before Time." It makes guests laugh and doesn't tell neighbors what equipment you're using.
When Mesh Actually Makes Sense (And When It Doesn't)
You've seen the ads for mesh Wi-Fi systems like Eero or Google Nest Wi-Fi. They promise whole-home coverage with no dead zones. They cost $200 to $600 for a three-pack. Do you need one? Probably not—unless your home has specific challenges.
Mesh systems are overkill for apartments, small houses under 1,500 square feet, or homes with open floor plans. A single good Wi-Fi 6 router placed centrally will cover that just fine. I tested this: my 1,800-square-foot house with the Archer AX21 in the living room got strong signals in every bedroom and the backyard. No mesh needed.
But if your home is over 2,500 square feet, has multiple floors with concrete between them, or is shaped like a long rectangle (common in older homes), mesh becomes worth it. The key difference is that mesh nodes talk to each other wirelessly, creating a single seamless network. Range extenders, by contrast, create a second network that halves your speed every time you hop to it. Mesh doesn't do that.
If you do go mesh, buy a system that supports Wi-Fi 6 and has a dedicated backhaul channel (a separate radio for node-to-node communication). The TP-Link Deco X20 three-pack is a solid entry point at around $200. It's not cheap, but it beats paying your ISP $15 a month forever.
The One Setting That Doubled My Speeds
After I set up my new router, I noticed my speeds were good but not great—around 300 Mbps on a 500 Mbps plan. I dug into the router's web interface (not the app, the full settings page at 192.168.0.1) and found the culprit: my router was using "Auto" channel selection. That meant it was picking the same crowded Wi-Fi channel as my neighbors.
In a dense apartment building or suburban neighborhood, everyone's router defaults to channel 1, 6, or 11 on the 2.4 GHz band. They're all shouting over each other. I used the Wi-Fi Analyzer app to see which channels were least congested. Channel 3 on 2.4 GHz was nearly empty. I manually set my router to that channel. My speeds jumped to 480 Mbps instantly.
On the 5 GHz band, I did the same thing. I found that channel 149 was wide open. That's a "DFS" (Dynamic Frequency Selection) channel that shares spectrum with weather radar. Some routers avoid it by default, but it's perfectly safe to use in residential areas. I enabled it. My latency dropped from 28 ms to 11 ms. That's a difference you can feel in video calls and online gaming.
Actionable takeaway: log into your router's web interface (check the manual for the default IP address). Look for "Wireless Settings" and change "Channel" from "Auto" to a specific number. Use a Wi-Fi analyzer to find the least crowded channel in your area. This is a free, five-minute tweak that can double your real-world speeds.
Why You Shouldn't Trust Your ISP's "Speed Boost"
When I called my ISP to cancel my rental, they offered me a "free speed boost" from 500 Mbps to 1 Gbps for the same price. I almost said yes. Then I asked: "Does that require a new router?" Yes, it did—a new rental at $15/month. The speed boost itself was a marketing gimmick to lock me into another two-year contract with their hardware.
Here's the reality: most households don't need gigabit speeds. A 500 Mbps plan can handle four 4K streams simultaneously plus gaming plus video calls. The bottleneck is almost never your internet plan. It's your router, your Wi-Fi placement, or your device's Wi-Fi card. Upgrading your plan without upgrading your hardware is like putting premium fuel into a car with a clogged fuel filter.
I stuck with my 500 Mbps plan. After my router swap, I get 480 Mbps consistently. That's 96% of my plan's advertised speed. With my ISP's router, I was getting 45 Mbps—9% of the plan. The hardware was the problem, not the plan. Don't let them upsell you on speed until you've fixed your setup first.
What to Do When You Travel (Or Just Want Peace of Mind)
One last thing: your home network is only as secure as the devices on it. Smart plugs, cameras, and IoT gadgets are notoriously insecure. They often have default passwords that never get changed. If a hacker compromises your smart bulb, they can use it to jump to your laptop or phone.
I solved this by creating a "guest network" on my new router. All my smart home devices—the thermostat, the doorbell, the plugs—connect to that isolated network. They can't talk to my laptop or phone. They can't see my file shares. If one gets hacked, the rest of my network is safe. This took 90 seconds to set up in the router app.
I also enabled "remote management" over VPN only. That means I can check my home cameras while traveling, but only through an encrypted connection. Most routers offer a free VPN server built in. I turned it on, installed a VPN client on my phone, and now I can access my network securely from anywhere. No monthly VPN subscription needed.
Actionable takeaway: log into your router app and look for "Guest Network" or "IoT Network." Enable it. Connect all your smart home devices to that network. Keep your phones, laptops, and gaming consoles on the main network. This simple separation is the single best security upgrade you can make for free.
I'm now six months into my DIY router experiment. My wife hasn't complained about buffering once. My Zoom calls are crystal clear. And I've saved $90 so far—money I would have handed to my ISP for hardware they didn't even support properly. The best part? I own my network now. If something breaks, I fix it. If I want faster Wi-Fi, I upgrade the router, not the plan. That control is worth more than any speed test can measure.