Skip the 10-hour boil. Learn how to build deep, umami-rich tonkotsu, shoyu, and miso ramen broths at home with shortcuts that actually work.
- September 2, 2026
AceShowbiz - You've watched the grainy YouTube videos of Tokyo ramen masters straining pork bones for 18 hours, and you've thought, that looks incredible, but I have a job and a social life. Here's the truth: you don't need a commercial kitchen, a gas-fired wok, or a 5 AM wake-up call to make ramen broth that tastes like it came from a serious shop. The secret isn't time alone—it's temperature control, fat management, and layering flavors strategically. In the next hour and a half, you can produce a broth with enough collagen-rich body and deep savoriness to make your local delivery spot nervous.
The average American spends $15 to $20 per bowl of restaurant ramen, and that's before the tip and the $6 matcha soft serve. Meanwhile, a whole chicken, a pound of pork neck bones, and a few aromatics cost about $12 total—and they yield enough broth for four generous bowls. That's a 75% savings, and you get to control the salt, the heat, and the toppings. The real hurdle isn't money or skill; it's knowing which corners to cut without sacrificing the soul of the dish.
This guide walks you through three distinct broth styles—tonkotsu (creamy pork), shoyu (soy-based chicken), and miso (hearty and complex)—using methods that fit a weeknight schedule. You'll learn the chemistry behind the cloudy creaminess, how to build umami in layers, and the one tool that makes everything easier. By the end, you'll have a reliable, repeatable recipe that you can tweak based on what's in your fridge.
Why Your Broth Tastes Thin (And How to Fix It)
Most homemade ramen fails because people treat it like chicken noodle soup. They simmer a carcass for an hour, strain it, and call it a day. The result is a pale, watery liquid that tastes more like tea than ramen. Restaurant broth gets its richness from two sources: gelatin from connective tissue and emulsified fat. You need both, and you need them in balance.
Gelatin comes from collagen, which breaks down between 160°F and 180°F. Chicken wings, pork trotters, and beef oxtail are collagen bombs—they're cheap, and they turn a broth from thin to silky. The second component is fat, which must be physically incorporated into the liquid. In tonkotsu, that happens through a rolling boil that breaks fat into tiny droplets that stay suspended, creating that milky white color. If you simmer gently, you get a clear broth with a greasy slick on top—not what you want.
Here's your actionable fix: use a pressure cooker if you have one. It doesn't reduce flavor; it accelerates collagen extraction from 8 hours to 1 hour. If you don't own one, crank the heat to a hard boil for the last 30 minutes of cooking. That agitation is what emulsifies the fat. You'll see the broth transform from translucent to opaque right before your eyes.
One more pro move: skim the scum—the gray foam that rises in the first 20 minutes—but don't skim the fat afterward. The fat is flavor. If you find the broth too oily, you can cool it and lift the solid fat cap later, but for ramen, you want that richness.
Building the Base: The Aromatics and Umami Layer
Before you even touch the bones, you need a flavor foundation. In Japanese ramen, this is called the tare—a concentrated seasoning sauce that's added to the bowl before the broth. The tare is not optional; it's what makes ramen taste like ramen instead of salty meat water. There are three main types: shoyu (soy sauce), miso (fermented soybean paste), and shio (salt). Each pairs with a different broth style, but they all share a common backbone of garlic, ginger, and scallion.
Start by making a simple garlic-ginger oil. Heat a quarter cup of neutral oil (canola or grapeseed) in a small pan over low heat. Add four smashed garlic cloves and a two-inch knob of ginger, sliced thin. Cook for 10 minutes until fragrant but not browned—you're infusing, not frying. This oil adds a fragrant, savory note that restaurant ramen gets from frying aromatics in pork fat. Store it in a jar; it keeps for a week and works on fried rice, vegetables, or eggs.
For the shoyu tare, combine half a cup of good soy sauce (usukuchi if you can find it, but regular works), a quarter cup of mirin, two tablespoons of rice vinegar, and a teaspoon of sugar. Simmer for 5 minutes, then cool. This mixture is salty, sweet, and tangy—it balances the fat of the broth. For miso tare, whisk a quarter cup of red miso paste with two tablespoons of sake and one tablespoon of brown sugar until smooth.
The practical takeaway: make your tare first, taste it, and adjust. It should be aggressively seasoned because you'll only add 2 to 3 tablespoons per bowl. If the tare is bland, the final bowl will be flat. This is the step that separates a home cook from someone who gets asked for the recipe.
Tonkotsu Broth in 90 Minutes (Pressure Cooker Method)
Tonkotsu is the king of ramen broths—pork bones boiled until they release their marrow and collagen, creating a thick, milky liquid that coats your tongue like cream. The traditional method takes 12 to 18 hours. The pressure cooker method takes 90 minutes, and the results are shockingly close. Here's the exact formula.
You'll need 2 pounds of pork neck bones (ask your butcher; they're usually 99 cents a pound), 1 pound of pork trotters (split lengthwise), and 1 pound of chicken backs or wings. The combination of neck bones and trotters gives you both meaty flavor and heavy collagen. Soak the bones in cold water for 30 minutes to draw out blood, then drain. This step reduces off-flavors and keeps the broth clean.
Place the bones in your pressure cooker, cover with cold water, and bring to pressure on high for 45 minutes. Release the pressure naturally for 15 minutes, then carefully open the lid. At this point, the liquid will be pale and murky—that's fine. The next step is crucial: transfer the pot to the stove and bring it to a hard, rolling boil for 20 to 30 minutes. Stir occasionally and use a potato masher to crush the bones against the side of the pot. This breaks up marrow and connective tissue, releasing fat and protein into the liquid. You'll see the broth turn from gray to a creamy beige.
Strain the broth through a fine-mesh sieve, pressing on the solids to extract every drop of liquid. You should have about 6 cups of rich, opaque broth. Season with your shoyu or shio tare, and you're ready. If you want an even deeper flavor, roast the bones at 400°F for 30 minutes before pressure cooking—this adds a caramelized, nutty note that some tonkotsu shops favor.
The actionable tip: don't skip the hard boil stage. The pressure cooker extracts collagen, but the boil is what creates the emulsified, creamy texture. Without it, you'll have a gelatinous soup, not a luscious broth.
Shoyu Chicken Broth: The Weeknight Workhorse
If tonkotsu is the weekend project, shoyu chicken broth is the Tuesday-night hero. It's lighter, faster, and more versatile—you can use it for ramen, udon, or even as a base for a quick noodle soup. The key is using chicken parts with skin and bones, not boneless breasts. You want the fat and the collagen.
In a large pot, combine 2 pounds of chicken wings (split at the joint), 1 onion (halved, skin on), 1 head of garlic (cut in half), a 2-inch piece of ginger (sliced), and 2 scallions (cut into 3-inch pieces). Cover with 8 cups of cold water. Bring to a boil, then reduce to a simmer. Skim the scum for the first 20 minutes—this is non-negotiable if you want a clean, golden broth. Then cover and simmer gently for 2 hours.
After 2 hours, the broth will be pale gold and deeply savory. Strain it, then add your shoyu tare to taste—start with 2 tablespoons per bowl and adjust. The beauty of this broth is its clarity; it's not meant to be creamy. It's meant to be clean and aromatic, letting the soy sauce and aromatics shine.
One upgrade: after straining, add a sheet of kombu (dried kelp) and a handful of dried shiitake mushrooms to the hot broth. Let them steep for 10 minutes, then remove. This adds a layer of glutamates—the savory, mouthwatering quality that makes ramen addictive. You don't need to boil them; hot water is enough to extract their flavor.
The takeaway: this broth freezes beautifully. Portion it into quart-sized zip-top bags, lay them flat in the freezer, and you'll have ramen base on demand for a month. Just reheat, add tare, and build your bowl.
Miso Ramen: The Cheater's Path to Big Flavor
Miso ramen is the most forgiving of the three styles because miso paste is a flavor bomb—it's salty, funky, and packed with umami. You don't need a complex broth to make it work. In fact, a simple chicken or vegetable broth can be elevated dramatically by a good miso tare and a spoonful of butter. Yes, butter. It's a classic Hokkaido addition that makes the broth round and luxurious.
Start with a basic broth: simmer 2 pounds of chicken thighs (bone-in, skin-on) with an onion, a carrot, and a few garlic cloves in 8 cups of water for 1 hour. The chicken thighs give you a rich, meaty base without needing pork bones. While that simmers, make your miso tare: whisk a half cup of red miso with 2 tablespoons of sake (or dry sherry), 1 tablespoon of sugar, and 1 teaspoon of chili paste (like sambal oelek) for a gentle kick.
When the broth is ready, strain it and discard the solids—you can shred the chicken for topping. Ladle a cup of hot broth into a bowl, add 2 tablespoons of the miso tare, and stir until dissolved. Taste. You'll notice the miso needs fat to shine, so add a pat of unsalted butter (about a tablespoon) and stir until melted. The butter emulsifies into the broth, giving it a silky texture that mimics tonkotsu without the hours.
For toppings, this is where you can go wild: soft-boiled eggs (6 minutes, then ice bath), sliced pork belly, corn kernels, bean sprouts, and a sprinkle of sesame seeds. The miso broth is robust enough to handle bold toppings, unlike a delicate shio broth.
The actionable tip: always bloom your miso in a bit of hot broth before adding it to the pot. If you add miso directly to boiling liquid, it can clump and turn bitter. Whisk it separately, then combine. This ensures a smooth, evenly seasoned broth every time.
Assembling the Perfect Bowl (And Avoiding Common Mistakes)
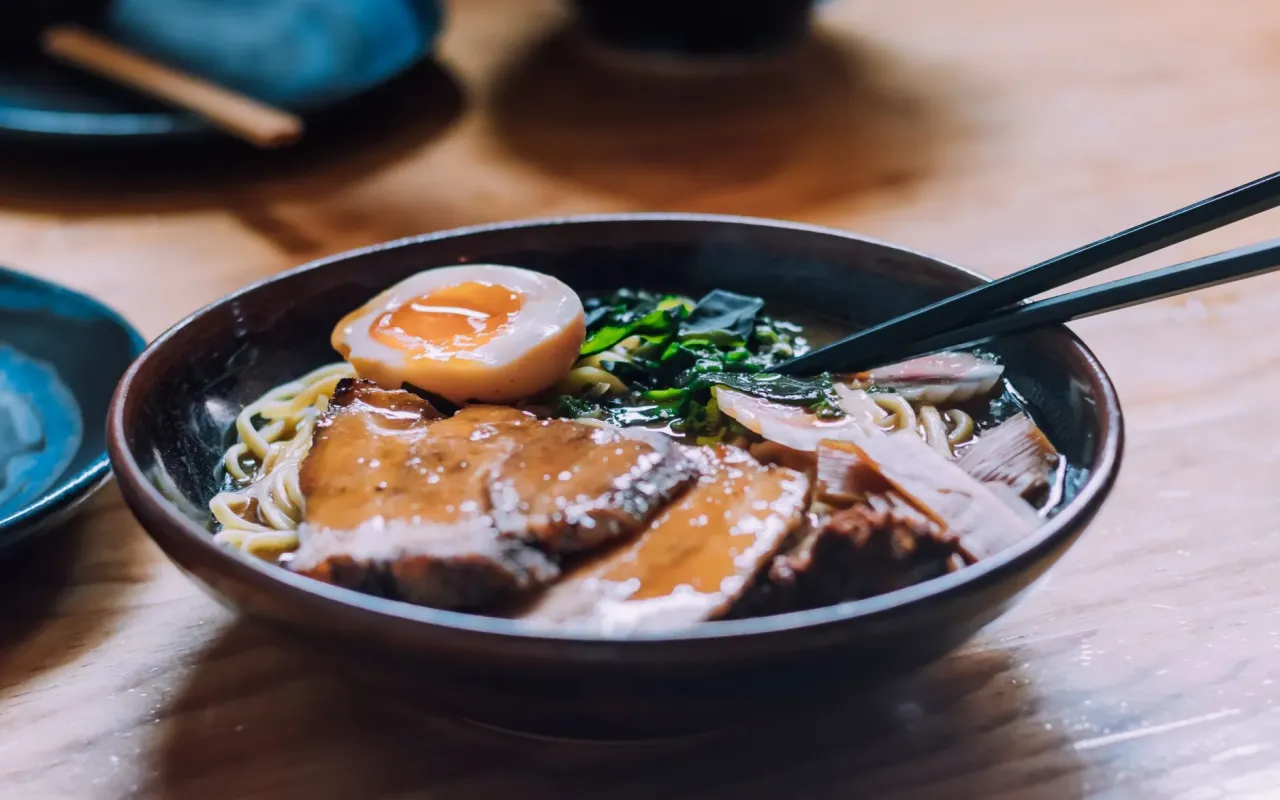
You've made the broth, you've made the tare—now it's time to put it all together. The order matters more than you think. First, place your tare at the bottom of the bowl (2 to 3 tablespoons). Then add your noodles—fresh or dried, but cook them al dente because they'll continue to cook in the hot broth. Next, ladle the hot broth over the noodles, pouring from the side to preserve the presentation. Finally, add your toppings in a clockwise arrangement: chashu (pork belly), egg, scallions, nori, and any vegetables.
The most common mistake is overcrowding the bowl. Ramen is about balance—you want every bite to have a bit of everything, but not a mountain of toppings that overwhelm the broth. Keep it to 4 or 5 components max. Another mistake is using cold bowls. Warm your bowls by filling them with hot water while you finish cooking. A cold bowl will instantly drop the broth temperature, dulling the flavors.
Noodles matter more than you think. Fresh ramen noodles (found in the refrigerated section of Asian grocery stores) have a springy, chewy texture that dried noodles can't match. If you can't find fresh, buy the best dried ramen you can—look for "alkaline" noodles, which have a yellow tint and are made with kansui (alkaline water). This gives them that characteristic bounce.
Finally, taste before you serve. Add a splash of soy sauce or a pinch of salt if the broth needs it. Ramen is a personal thing—some like it saltier, some richer. Trust your palate, and don't be afraid to adjust.
One last pro move: finish the bowl with a drizzle of sesame oil or chili oil right before serving. It adds a final layer of aroma that makes the whole bowl smell like a restaurant. You'll never look at instant ramen the same way again.