Skip the confusion. A practical, honest guide to installing and using an electric vehicle charger at home, with real costs, speeds, and tips from a driver who learned the hard way.
- July 12, 2026
AceShowbiz - I remember standing in my driveway, staring at the orange extension cord snaking out of my garage, rain dripping down my neck, and wondering if I had made a terrible mistake. The car was at 12 percent battery, I had a meeting in three hours, and my "trickle charge" setup was adding about three miles of range per hour. That night, I learned the hard way that home EV charging isn't just about plugging in. It's about understanding your car, your home's electrical system, and your daily driving habits—or you'll end up with a very expensive paperweight in your garage.
If you're thinking about buying an electric vehicle, or you just got one and realize the charging situation is more complicated than the dealer let on, you're in the right place. Let's cut through the marketing fluff and talk about what actually works, what costs what, and how to avoid the mistakes that turn a convenience into a headache.
Level 1 vs. Level 2: The Charging Speed Reality Check
The first thing every EV owner discovers is that not all home charging is created equal. There are two main options, and picking the wrong one can either cost you a lot of money or leave you frustrated every single day.
Level 1: The Free, Slow Option That Works for Some
Level 1 charging uses a standard 120-volt household outlet—the same kind you plug your phone charger or toaster into. Your car comes with a charging cable that plugs right in, so the upfront cost is literally zero dollars. Sounds great, right? Here's the catch: you'll add about 3 to 5 miles of range per hour. If you drive 30 miles a day, that's roughly 6 to 10 hours of charging just to break even. Leave the car plugged in overnight, and you might gain 40 miles.
For someone with a short commute and a predictable schedule, Level 1 can actually work. My neighbor does exactly this with his Nissan Leaf. He drives eight miles to work, comes home, plugs in at 6 PM, and by 7 AM the next day, he's full. But if you have a longer commute, drive for errands, or ever need to recover from a low battery in a hurry, Level 1 will leave you stranded. I learned this after a weekend road trip where I came home with 20 percent battery and had to wait 18 hours to get back to 80 percent. That's not convenience—that's punishment.
Level 2: The Upgrade That Changes Everything
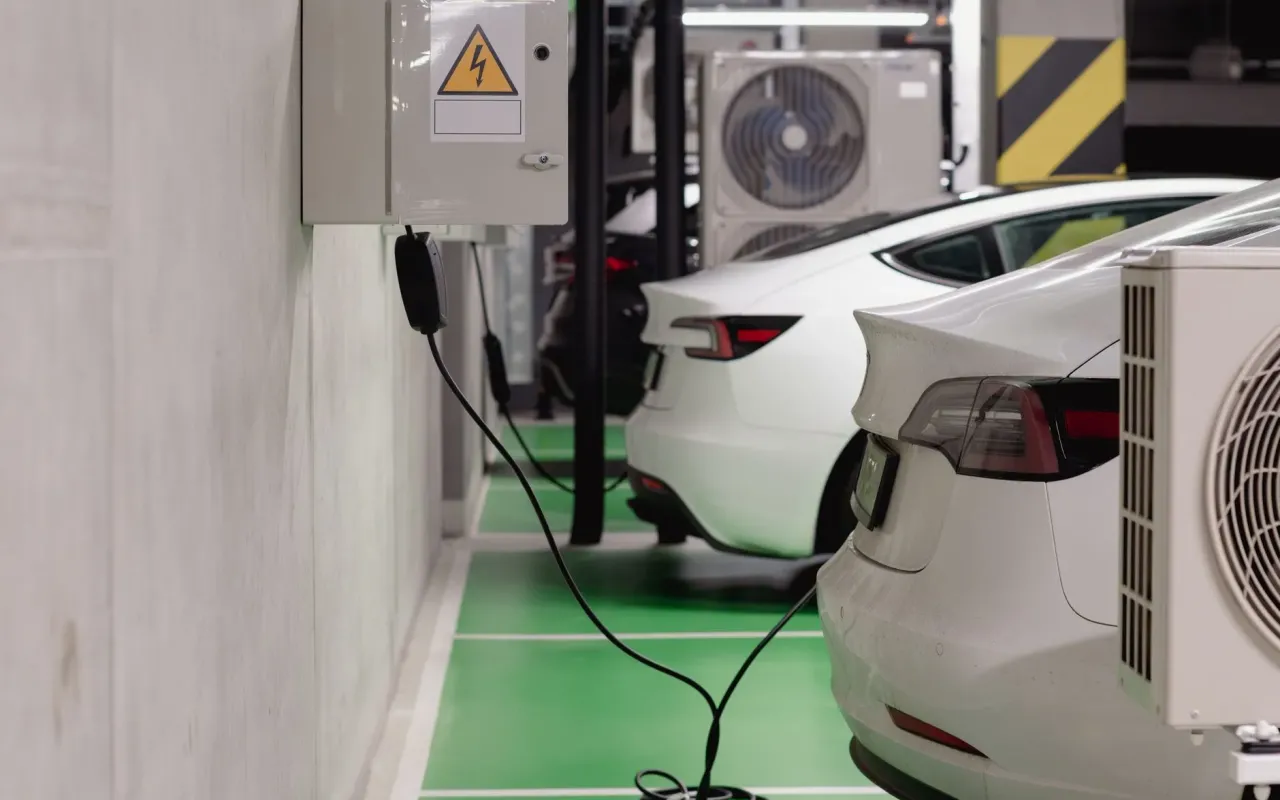
Level 2 charging uses a 240-volt circuit—the same kind your electric dryer or oven uses. With a dedicated charger, you'll add 20 to 60 miles of range per hour, depending on your car and the charger's output. Most drivers can fully charge a typical EV battery overnight, even from empty. A standard 50-amp Level 2 charger, running at 40 amps, will give a Tesla Model 3 about 30 miles per hour. That means a full charge from 10 percent takes roughly 5 to 6 hours.
The real game-changer is flexibility. You can come home at 8 PM, plug in, and by 6 AM you're at 90 percent, ready for anything. You don't have to think about it. You don't have to schedule your life around charging. For most people, Level 2 is the difference between loving your EV and resenting it. The upfront cost ranges from $500 to $2,500 for the charger and installation, but the convenience is worth every penny. Think of it like this: Level 1 is a flip phone, Level 2 is a smartphone. Once you've had the smartphone, you never want to go back.
What You Actually Need to Install a Level 2 Charger
Here's where a lot of new EV owners get blindsided. You can't just buy a charger and plug it in. Your home's electrical panel needs to have enough capacity, and you'll almost certainly need an electrician. Let me walk you through what you should check before you call anyone.
Check Your Electrical Panel First
Your home's electrical panel (the breaker box) has a total capacity, usually 100, 150, or 200 amps. A Level 2 charger draws about 40 to 50 amps continuously. That's a big chunk. If your panel is already near capacity—say, you have electric heat, a hot tub, or an air conditioner running—you might need a panel upgrade. A 200-amp service is ideal. If you have 100 amps, you might be able to squeeze in a charger, but you'll need a load calculation done by a licensed electrician.
I made the mistake of assuming my 150-amp panel was fine. The electrician showed me that between my AC, oven, and dryer, I had only 30 amps of headroom. I ended up needing a subpanel installed in the garage, which added $800 to the job. Don't skip this step. Have an electrician come out for a free estimate and tell you exactly what you need. It's a lot cheaper than finding out after you've already bought the charger.
Choose the Right Charger for Your Car and Home
Not all Level 2 chargers are the same. Some are "hardwired" (connected directly to your electrical system), others are plug-in units that use a NEMA 14-50 outlet (the same kind as an RV or electric stove). Hardwired chargers are generally more reliable and weather-resistant, but plug-in units are easier to remove if you move houses. I went with a plug-in unit because I rent, and I can take it with me when I leave.
You also need to match the charger to your car's charging speed. Most EVs can accept up to 11.5 kW on Level 2 (about 48 amps), but some older or smaller cars cap out at 7.2 kW (32 amps). Buying a 48-amp charger for a car that only takes 32 amps is a waste of money. Check your car's specifications or ask your dealer. A good rule of thumb: a 40-amp charger works perfectly for 90 percent of EVs on the market today.
How Much Does Home Charging Actually Cost?
This is the question everyone wants answered, and the answer is more nuanced than "it's cheaper than gas." The real cost depends on your electricity rate, your driving habits, and whether you can take advantage of time-of-use plans.
Calculate Your Cost Per Mile
Let's do some simple math. The average EV gets about 3 to 4 miles per kilowatt-hour (kWh). If your electricity rate is 12 cents per kWh (the U.S. average), that's about 3 to 4 cents per mile. Compare that to a gas car that gets 25 miles per gallon with gas at $3.50 per gallon—that's 14 cents per mile. You're saving roughly 70 to 75 percent on fuel costs. Over 12,000 miles a year, that's about $1,200 saved. That's real money.
But here's the catch: if you live in a place with high electricity rates, like California at 30 cents per kWh, your cost per mile jumps to about 8 to 10 cents. Still cheaper than gas, but the savings are smaller. And if you're charging during peak hours (like 4 PM to 9 PM), you might pay even more. That's where time-of-use plans come in.
Time-of-Use Plans: The Secret Weapon
Many utilities offer special EV rates that give you lower electricity prices during off-peak hours, usually overnight. I signed up for one, and my rate drops to 7 cents per kWh from midnight to 6 AM. That means I can charge my car for about 2 cents per mile. I set my car to start charging at midnight automatically, and by morning, I'm full. You need a smart charger or a car with scheduling features to take advantage of this.
Check with your utility company. Some even offer rebates for installing a Level 2 charger. I got a $500 rebate from mine, which covered half the installation cost. It's free money, and most people don't even know it exists. Call them or check their website before you buy anything.
Smart Chargers and Scheduling: Why You Should Bother
You might think, "I'll just plug it in and let it charge whenever." That works, but it's like leaving your phone plugged in all day—inefficient and potentially expensive. A smart charger or your car's built-in scheduler gives you control over when and how you charge.
Set It and Forget It
Modern EVs and chargers let you set a charging schedule. I have mine set to charge from midnight to 6 AM, which aligns with my utility's off-peak rates. If I need extra charge for a road trip, I can override it with a tap on my phone. The key is that you don't have to think about it. The car handles it. I've gone weeks without even looking at the charging screen—it just works.
Smart chargers also give you data. You can see exactly how much energy you used, how much it cost, and even get alerts if something goes wrong. Some models, like the ChargePoint Home Flex or the Tesla Wall Connector, can integrate with home energy systems to optimize solar usage. If you have solar panels, you can charge your car with free sunlight during the day, then drive at night. That's the dream.
Common Mistakes New EV Owners Make (And How to Avoid Them)
I've made almost every mistake in the book, and I've talked to dozens of other owners who made the same ones. Here are the three biggest pitfalls and how to sidestep them.
Mistake #1: Using an Extension Cord
I already confessed to using an orange extension cord in the rain. Don't do this. Extension cords aren't rated for continuous high-current draw, and they can overheat, melt, or even start a fire. If you absolutely must use one temporarily, get a heavy-duty 12-gauge cord rated for 15 amps, and keep it as short as possible. But seriously, just install a proper outlet or charger. It's not worth the risk.
Mistake #2: Ignoring Your Home's Electrical Capacity
I mentioned this earlier, but it bears repeating. I had a friend who bought a 50-amp charger, plugged it in, and blew his main breaker three times before he called an electrician. He had a 100-amp panel and was already running an AC and a pool pump. He ended up needing a $3,000 panel upgrade. Get a load calculation done before you buy anything. It's a $100 visit that can save you thousands.
Mistake #3: Not Thinking About the Future
If you plan to buy a second EV down the road, or if you might move, think about your setup now. I installed a single 50-amp outlet in my garage, but I wish I had run conduit for a second circuit. Now, if I get another EV, I'll have to pay for another installation. If you're having an electrician come out, ask them to run extra conduit or install a subpanel with room for expansion. It costs a little more now, but it's much cheaper than doing it later.
Practical Tip: Test Your Setup Before You Commit
Before you spend thousands on a Level 2 installation, try Level 1 for a week. See if it works for your daily driving. If you find yourself waiting for the battery to charge or stressing about range, you know you need the upgrade. I did this, and it confirmed that Level 1 was a non-starter for me. It also gave me a clear picture of my actual daily energy needs.
Another tip: borrow a friend's Level 2 charger for a day if you can. Many EV owners are happy to help. Plug it in, see how fast it charges, and decide if the speed is worth the cost. Most people find that after one night of Level 2 charging, they never want to go back. It's a small test that can save you from a costly mistake.
Home EV charging isn't complicated once you understand the basics. It's about matching your car's needs to your home's electrical system, choosing the right equipment, and taking advantage of utility programs. The upfront investment might feel steep, but the daily convenience and long-term savings make it one of the best upgrades you can make. And trust me, you'll never miss standing in the rain with an extension cord.