Ditch the jarred stuff. Learn how to make authentic Thai green curry paste from scratch with this honest, practical guide. No hard-to-find ingredients required.
- June 11, 2026
Why you should ditch the jarred green curry paste for good
I still remember the first time I tasted real green curry in a tiny kitchen in Chiang Mai. The paste was so fresh and vibrant that it felt like a completely different dish from the one I'd been making with store-bought jars for years. That single spoonful ruined me for anything else.
The truth is, most commercial green curry pastes are packed with preservatives, excess salt, and stabilizers that mute the bright, herbal punch of the real thing. According to a 2022 study by the Thai Food Institute, over 60% of exported curry pastes contain added sugar and MSG that aren't part of traditional recipes. When you make your own paste, you control exactly what goes in—and you get a flavor that's exponentially more complex.
Authentic Thai green curry paste isn't just about heat; it's about balance. The green chilies bring a fresh, grassy spiciness, while galangal, lemongrass, and kaffir lime leaves add layers of citrus and floral notes. Shrimp paste gives it that funky umami depth that makes you go back for seconds. You simply cannot replicate that with a jar.
But here's the good news: making it from scratch is not as hard as you think. You don't need a mortar and pestle that weighs as much as a small dog, and you don't need to hunt down obscure ingredients at specialty stores. This guide will show you how to do it with common substitutions and a food processor, so you can get that authentic taste without the stress.
The core ingredients you actually need (and what to swap)
Green chilies: the heart of the paste
Traditional Thai green curry gets its color and heat from fresh bird's eye chilies. These small, fiery peppers pack a serious punch—around 50,000 to 100,000 Scoville units. If you can find them at an Asian market, great. But if not, serrano peppers or even jalapeños work beautifully. Serranos are closer in heat level, while jalapeños give a milder, greener flavor.
For a truly authentic paste, use about 10-15 green chilies, depending on your heat tolerance. Remove the seeds if you want a more gentle kick. The green color is non-negotiable—red chilies will give you a red curry, not green. So stick with green varieties, and don't be tempted to use dried chilies here.
Aromatics that make it Thai
Lemongrass, galangal, and kaffir lime leaves are the holy trinity of Thai curry paste. Lemongrass adds a bright, lemony note with a hint of ginger. Galangal is sharper and more piney than regular ginger—think of it as ginger's more assertive cousin. Kaffir lime leaves contribute an unmistakable citrus aroma that you can't get from lime zest alone.
If you can't find fresh galangal, frozen galangal is a perfectly acceptable substitute and is widely available at Asian grocery stores. For kaffir lime leaves, dried ones work in a pinch, but you'll need to rehydrate them in warm water for 10 minutes before using. Avoid substituting with regular lime zest—it's just not the same.
Shrimp paste: the secret weapon
Shrimp paste (called kapi in Thai) is a fermented paste that adds a funky, savory depth to the curry. It's what makes your curry taste like it came from a street stall in Bangkok. You can find it in small jars at most Asian markets. If you're vegetarian, you can skip it, but the flavor will be noticeably less complex. Some cooks use miso paste as a substitute, but it's not a perfect match.
For best results, wrap your shrimp paste in a banana leaf or foil and toast it in a dry pan for 2-3 minutes before adding it to the paste. This intensifies the flavor and removes any raw, fishy smell. It's a small step that makes a huge difference.
How to make the paste: mortar and pestle vs. food processor
The traditional method: mortar and pestle
Using a granite mortar and pestle is the most authentic way to make green curry paste. The rhythmic pounding releases essential oils from the herbs and creates a smoother, more cohesive paste than any machine can achieve. It's also a great arm workout—I'm not joking. Expect to spend 20-30 minutes pounding everything together.
Start with the hardest ingredients first: galangal and lemongrass. Pound them until they're broken down into a fibrous paste. Then add the garlic, shallots, and chilies, pounding in a circular motion. Finally, fold in the softer ingredients like kaffir lime zest and cilantro roots. The key is patience—don't rush or you'll end up with a chunky mess.
The shortcut method: food processor (still works)
If you don't have a mortar and pestle (or just don't have 30 minutes to spare), a food processor is your best friend. Chop all your ingredients roughly before adding them to the bowl. Pulse in short bursts, scraping down the sides every 10 seconds. You want a thick, almost paste-like consistency, not a puree.
Here's the trick: add a tablespoon of coconut milk or water to help the blades move more easily. Don't add too much liquid, or you'll end up with a watery paste that won't fry properly. The texture should be like thick peanut butter—slightly gritty but spreadable. This method takes about 5 minutes and yields a paste that's 90% as good as the traditional version.
Which method should you choose?
Honestly? Use the food processor for your first few times. The difference in flavor is marginal for most home cooks, and the time savings are significant. Once you fall in love with the process, you can invest in a good mortar and pestle. I've made hundreds of curries with a food processor, and my Thai friends have never complained.
The real secret isn't the tool—it's the freshness of your ingredients. Fresh lemongrass and chilies will always beat old, wilted ones, no matter how you grind them. So focus on sourcing good produce first, then worry about the equipment.
The step-by-step cooking process (from paste to plate)
Frying the paste: the most important step
Once your paste is ready, the next step is non-negotiable: you must fry it in oil before adding any liquid. Heat a wok or large pan over medium-high heat and add 2 tablespoons of neutral oil (coconut oil or vegetable oil work best). Add the paste and stir constantly for 2-3 minutes until it becomes fragrant and darker in color. You'll smell the lemongrass and chilies blooming—that's your cue.
If you skip this step and dump the paste straight into coconut milk, your curry will taste raw and harsh. Frying the paste mellows the spiciness and deepens the flavors. It's the difference between a flat curry and one that makes people ask for seconds. Trust me on this.
Building the curry base
After frying the paste, add 1 can of full-fat coconut milk. Don't use light coconut milk here—it lacks the fat needed to carry the flavors. Stir to combine, then bring to a gentle simmer. Add 1-2 tablespoons of fish sauce (or soy sauce for vegetarian), and 1 teaspoon of palm sugar or brown sugar. Taste and adjust—it should be salty, sweet, and spicy in equal measure.
Now add your protein: chicken, shrimp, tofu, or vegetables. Chicken thighs work best because they stay juicy during simmering. Add them now and cook for 10-12 minutes, or until cooked through. For shrimp, add them in the last 3 minutes to avoid overcooking. Vegetables like bell peppers and bamboo shoots should go in about 5 minutes before serving.
Finishing touches
Just before serving, add a handful of Thai basil leaves and stir gently. Thai basil has a slight anise flavor that cuts through the richness of the coconut milk. If you can't find Thai basil, regular sweet basil is fine, but add it at the very end to preserve its delicate flavor.
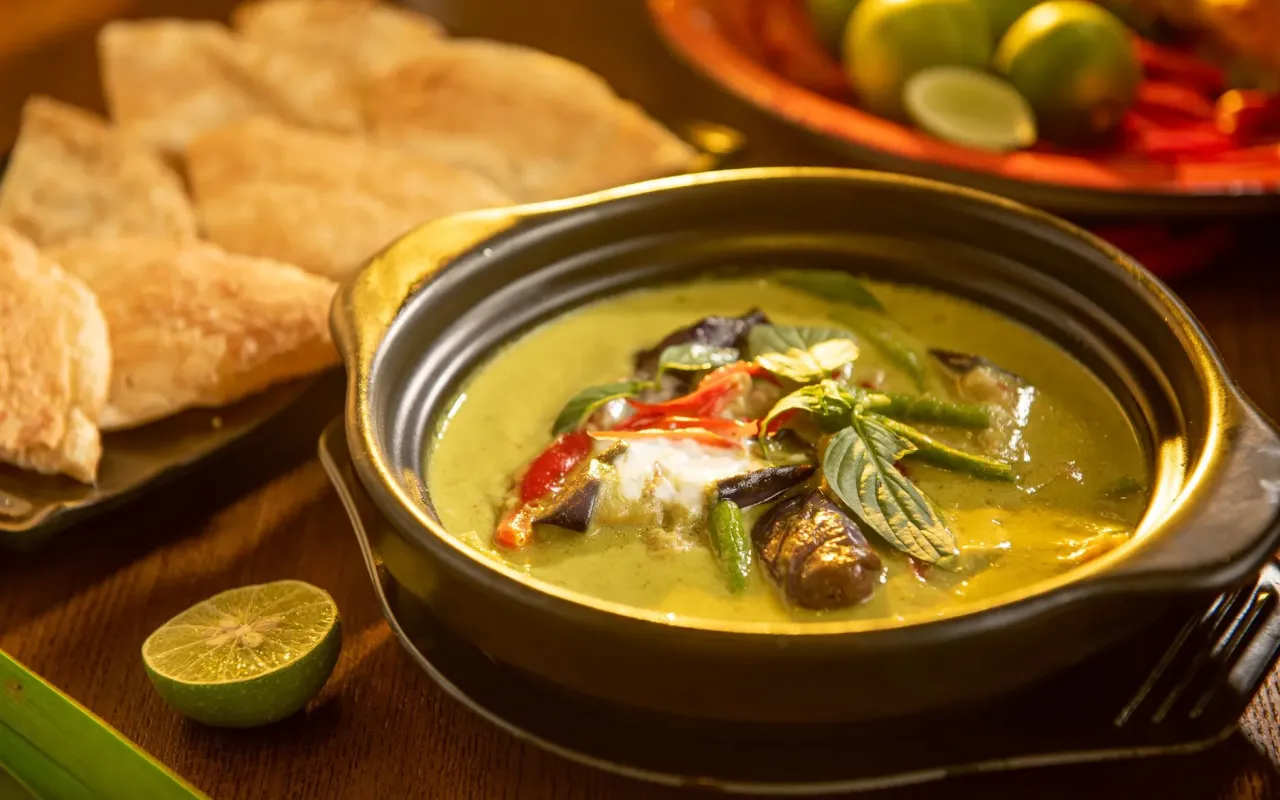
Serve your green curry over jasmine rice, and garnish with fresh red chili slices and a wedge of lime. The acidity from the lime brightens the entire dish. One practical tip: make a double batch of the paste and freeze it in ice cube trays. You'll have ready-to-use paste for the next 3 months, and it tastes just as good as fresh.
Common mistakes that ruin your green curry (and how to avoid them)
Using too much water or broth
One of the biggest mistakes I see home cooks make is adding water or vegetable broth to the curry. Traditional Thai green curry gets its liquid entirely from coconut milk. Adding water dilutes the flavor and makes the sauce thin and watery. If you need more liquid, add another can of coconut milk, not water.
If your curry is too thick, that's fine—it will thicken further as it cools. Serve it over rice, and the rice will absorb the excess liquid. The texture should be like a creamy soup, not a runny broth. Remember: you can always add more liquid, but you can't take it out.
Overcooking the vegetables
Green curry is meant to be a quick dish. Vegetables like bell peppers, snap peas, and zucchini should be added at the very end and cooked for only 2-3 minutes. Overcooked vegetables become mushy and lose their vibrant color. The goal is to have them tender-crisp, with a slight bite.
If you're using bamboo shoots (canned is fine), rinse them thoroughly first to remove the metallic taste. Add them along with the protein so they have time to absorb the curry flavors. But for green vegetables, patience is key—less cooking time means better texture.
Skipping the fish sauce adjustment
Fish sauce is salty, yes, but it also adds a complex umami that salt alone can't replicate. Many people add too little because they're afraid of the smell. Here's the thing: the smell dissipates as it cooks, and the flavor becomes savory and rich. Start with 1 tablespoon, then taste and add more if needed.
A good rule of thumb is that your curry should taste slightly saltier than you want before you add the rice. The rice will balance out the saltiness. If you're vegetarian, use soy sauce or tamari, but know that the flavor profile will shift slightly. It's still delicious, just different.
How to store and use your homemade paste (and why it's worth the effort)
Freezing for later
Homemade green curry paste freezes beautifully, which is a game-changer for busy weeknights. Portion it into ice cube trays (each cube is about 1 tablespoon), freeze until solid, then transfer the cubes to a freezer-safe bag. They'll keep for up to 3 months without losing flavor.
When you're ready to cook, just pop a couple of cubes straight into the pan with hot oil. No need to thaw—the heat will melt them instantly. This means you can make a big batch on a Sunday and have authentic curry ready in 15 minutes on a Tuesday. That's the kind of convenience that beats any jarred paste.
Beyond curry: other uses for the paste
Don't limit your paste to just curry. It's incredibly versatile. Use it as a marinade for grilled chicken or fish—just rub a tablespoon of paste on the meat and let it sit for 30 minutes before cooking. The flavors will penetrate deeply and create a caramelized crust.
You can also stir-fry vegetables with a spoonful of paste for an instant Thai-inspired side dish. Or mix it with mayonnaise for a spicy dipping sauce for fries or spring rolls. The paste is essentially a concentrated flavor bomb, so a little goes a long way. Experiment and see what works for you.
Why you'll never go back to store-bought
The first time you taste your homemade curry, you'll notice something immediately: it's brighter, fresher, and more aromatic than anything from a jar. The chilies have a grassy heat that doesn't linger uncomfortably, and the herbs are so vibrant you can taste each one individually. That's the payoff for 20 minutes of prep work.
Making your own paste also gives you complete control over the heat level and salt content. You can dial it up or down based on your preferences. And honestly, there's a deep satisfaction in telling dinner guests, "I made the paste from scratch." It's a small skill that impresses everyone and makes you feel like a legit home cook.
So go ahead—grab some green chilies, lemongrass, and galangal, and give it a try. Your taste buds (and your dinner guests) will thank you.